Wednesday, May 14, 2014

anyconnect installation stalled with hostscan data-limit

some time, the installation of anyconnect stalled, keep showing waiting for next hostscan or something like that

for the log of the ASA you can see error message like "Reject 293KB hostscan data from ip x.x.x.x host scan results exceed default limit 200kB"

here is the solution, increase the data-limit to a bigger number.

config t
  service internal
  webvpn

    hostscan data-limit 300

Wednesday, April 30, 2014

setup a lab with real devices, GNS, cloudy router XRV


physical topology:
1. ESXI host
2. on esxi, installed 3 XRV, each one have 4 ports, make sure you can access the console of these routers
you might need name pipe(near end: server, far end: virtual machine), if network console not working.

3. windows7 installed GNS3, installed putty to access console of XRV if network console not working
    a. depend on how many links you need connect to XRV you need install network adapter for each connection to XRV.
  b. you need install 3 serial ports for the connection of console of XRV use name pipe (near client, far end: virtual machine).
4. in GNS3 add cloud, configure cloud, add network adapters to Cx
5. add routers
6. use ESXi network adapter to connect to physical devices such as layer 3 switches, or connect to internet


for ESXI you need : Go into the vswitch properties. then click on security tab and change promiscuous mode reject to accept.

Thursday, April 24, 2014

Windows server 2012 remote desktop enable


1. enable remote desktop in system properties
 The Server Info launches the Control Panel System page. Click Advance System Settings on the right. This would launch the same System Properties page.
image
2. enable remote desktop -user mode (tcp-in)
GUI – Graphical User Interface
1. Open Control Panel, then select System and Security by clicking on that header
-
-
2. Select Windows Firewall
-
-
3. Advanced Settings
-
-
4. In ‘Windows Firewall with Advanced security’ click on ‘Inbound rules’

Friday, April 11, 2014

VPN service not available

VPN service not available

”The VPN service is not available & restart application after one minute.”

First try to start the service manually:
  1. Within Control Panel->System and Security->Admin Tools -> Services
  2. Look for the Cisco AnyConnect Secure Mobility Agent service
  3. Right click the service and select Start or Restart if the service is already running.

If that does not work:

1) Open Windows Explorer
2) Navigate to c:\windows\system32\drivers\etc
3) Move all files in the root to a new folder you create - any name is fine, I used 'old'.
4) Authorize the move in User Account Control.
5) Start Cisco AnyConnect client. You should not receive the error message.
6) Completely exit Cisco AnyConnect client.
7) Move HOSTS from 'old' back to c:\windows\system32\drivers\etc
8) Start Cisco AnyConnect client. You should not receive the error message.

Thursday, April 3, 2014

Cisco anyconnect error "Failed to install AnyConnect VPN Profile because of file move error. A VPN connection cannot be established."

some time you might seeing this error when installing Anyconnect. this could be the permission issue with client profile file, the .xml file.


to resolve the issue by verifying (and correcting) the permissions on the directory that the profile is stored in. This varies by operating system, the paths for XP and 7 are:

WinXP: C:\Documents and Settings\All Users\Application Data\Cisco\Cisco AnyConnect Secure Mobility Client\Profile

Win 7: C:\ProgramData\Cisco\Cisco AnyConnect Secure Mobility Client\Profile

In my case the permissions on the file got blanked somewhere along the way, just had to go to the next higher directory and re-propagate the permissions down to the child objects (files and subdirectories residing under this directory).

Monday, March 31, 2014

Cisco ASA ASDM Incompatibility with Java 7 Update 51

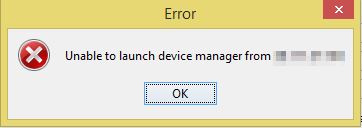
The latest version of Java 7 Update 51 that was deployed this week breaks access to Cisco ASA firewalls running ASDM.  When you connect with the ASDM you get the following error message: “Unable to launch device manager from X.X.X.X”
Unable to Launch Device Manager
“Unable to launch device manager from”
The symptoms are that the web page for the firewall will show up and display normally, but you can’t connect to the server with the ASDM launcher.  The log on the firewall shows
%ASA-6-302013: Built inbound TCP connection 112 for outside:X.X.X.X/64508 (X.X.X.X/64508) to identity:Y.Y.Y.Y/443 (Y.Y.Y.Y/443)
%ASA-6-725001: Starting SSL handshake with client outside:X.X.X.X/64508 for TLSv1 session.
%ASA-7-725010: Device supports the following 6 cipher(s).
%ASA-7-725011: Cipher[1] : RC4-SHA
%ASA-7-725011: Cipher[2] : DHE-RSA-AES128-SHA
%ASA-7-725011: Cipher[3] : DHE-RSA-AES256-SHA
%ASA-7-725011: Cipher[4] : AES128-SHA
%ASA-7-725011: Cipher[5] : AES256-SHA
%ASA-7-725011: Cipher[6] : DES-CBC3-SHA
%ASA-7-725008: SSL client outside:X.X.X.X/64508 proposes the following 8 cipher(s).
%ASA-7-725011: Cipher[1] : AES128-SHA
%ASA-7-725011: Cipher[2] : DHE-RSA-AES128-SHA
%ASA-7-725011: Cipher[3] : DHE-DSS-AES128-SHA
%ASA-7-725011: Cipher[4] : RC4-SHA
%ASA-7-725011: Cipher[5] : DES-CBC3-SHA
%ASA-7-725011: Cipher[6] : EDH-RSA-DES-CBC3-SHA
%ASA-7-725011: Cipher[7] : EDH-DSS-DES-CBC3-SHA
%ASA-7-725011: Cipher[8] : RC4-MD5
%ASA-7-725012: Device chooses cipher : RC4-SHA for the SSL session with client outside:X.X.X.X/64508
%ASA-7-725014: SSL lib error. Function: SSL3_READ_BYTES Reason: sslv3 alert certificate unknown
%ASA-6-725006: Device failed SSL handshake with client outside:X.X.X.X/64508
%ASA-6-302014: Teardown TCP connection 112 for outside:X.X.X.X/64508 to identity:Y.Y.Y.Y/443 duration 0:00:00 bytes 580 TCP Reset by appliance
Cisco has included this information in their latest release notes:
If you use Java 7 Update 51, you must upgrade ASDM to Version 7.1(5.100) or later, and you can only use the Java web start. The ASDM Launcher is not supported.
So the alternatives are to downgrade your Java on your workstation or upgrade to the latest ASDM version at this point to get the ASDM working again.

How to change the subnet mask of DHCP scope windows server

You can’t change the subnet mask of the DHCP scope directly without deleting the scope, need to delete the DHCP scope first then recreate the scope with new subnet, but this will lead to largeamount of manual work

To avoid the manual work use the below netsh command toChange the subnet mask in existing DHCP scope with the simple steps

Use the below command to export the scope configuration

Syntex:

C:\>netsh dhcp server \\”Server name” scope “scope subnet” dump>c:\dhcp.txt

Example:

C:\>netsh dhcp server \\Test01 scope 192.168.1.0 dump>c:\dhcp.txt

To change the subnet mask of the scope

Open the dhcp.txt file and change the subnet mask, dhcp.txt fileresemble the following


Changed the current scope context to 192.168.1.0 scope.

Dhcp Server 192.168.1.24 add scope 192.168.1.0 255.255.255.0 "Vlan-1" "Vlan-1"
Dhcp Server 192.168.1.24 Scope 192.168.1.0 set state 1


Edit the file and save

After this, delete the scope and run the below command to create the scope from the txt file 

C:\>netsh exec c:\dhcp.txt

This will automatically create the DHCP scope with the new subnet mask

This way you can change other configuration details along with subnet mask change, like IP range and Excluderanges

How to use Telus Actionec T3200M as a wireless Access point

when you install Telus Internet, they will offer you a modem + router + wireless device Actionec T3200M, a lot of users still want to use th...