Monday, March 31, 2014

Cisco ASA ASDM Incompatibility with Java 7 Update 51

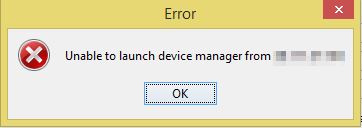
The latest version of Java 7 Update 51 that was deployed this week breaks access to Cisco ASA firewalls running ASDM.  When you connect with the ASDM you get the following error message: “Unable to launch device manager from X.X.X.X”
Unable to Launch Device Manager
“Unable to launch device manager from”
The symptoms are that the web page for the firewall will show up and display normally, but you can’t connect to the server with the ASDM launcher.  The log on the firewall shows
%ASA-6-302013: Built inbound TCP connection 112 for outside:X.X.X.X/64508 (X.X.X.X/64508) to identity:Y.Y.Y.Y/443 (Y.Y.Y.Y/443)
%ASA-6-725001: Starting SSL handshake with client outside:X.X.X.X/64508 for TLSv1 session.
%ASA-7-725010: Device supports the following 6 cipher(s).
%ASA-7-725011: Cipher[1] : RC4-SHA
%ASA-7-725011: Cipher[2] : DHE-RSA-AES128-SHA
%ASA-7-725011: Cipher[3] : DHE-RSA-AES256-SHA
%ASA-7-725011: Cipher[4] : AES128-SHA
%ASA-7-725011: Cipher[5] : AES256-SHA
%ASA-7-725011: Cipher[6] : DES-CBC3-SHA
%ASA-7-725008: SSL client outside:X.X.X.X/64508 proposes the following 8 cipher(s).
%ASA-7-725011: Cipher[1] : AES128-SHA
%ASA-7-725011: Cipher[2] : DHE-RSA-AES128-SHA
%ASA-7-725011: Cipher[3] : DHE-DSS-AES128-SHA
%ASA-7-725011: Cipher[4] : RC4-SHA
%ASA-7-725011: Cipher[5] : DES-CBC3-SHA
%ASA-7-725011: Cipher[6] : EDH-RSA-DES-CBC3-SHA
%ASA-7-725011: Cipher[7] : EDH-DSS-DES-CBC3-SHA
%ASA-7-725011: Cipher[8] : RC4-MD5
%ASA-7-725012: Device chooses cipher : RC4-SHA for the SSL session with client outside:X.X.X.X/64508
%ASA-7-725014: SSL lib error. Function: SSL3_READ_BYTES Reason: sslv3 alert certificate unknown
%ASA-6-725006: Device failed SSL handshake with client outside:X.X.X.X/64508
%ASA-6-302014: Teardown TCP connection 112 for outside:X.X.X.X/64508 to identity:Y.Y.Y.Y/443 duration 0:00:00 bytes 580 TCP Reset by appliance
Cisco has included this information in their latest release notes:
If you use Java 7 Update 51, you must upgrade ASDM to Version 7.1(5.100) or later, and you can only use the Java web start. The ASDM Launcher is not supported.
So the alternatives are to downgrade your Java on your workstation or upgrade to the latest ASDM version at this point to get the ASDM working again.

How to change the subnet mask of DHCP scope windows server

You can’t change the subnet mask of the DHCP scope directly without deleting the scope, need to delete the DHCP scope first then recreate the scope with new subnet, but this will lead to largeamount of manual work

To avoid the manual work use the below netsh command toChange the subnet mask in existing DHCP scope with the simple steps

Use the below command to export the scope configuration

Syntex:

C:\>netsh dhcp server \\”Server name” scope “scope subnet” dump>c:\dhcp.txt

Example:

C:\>netsh dhcp server \\Test01 scope 192.168.1.0 dump>c:\dhcp.txt

To change the subnet mask of the scope

Open the dhcp.txt file and change the subnet mask, dhcp.txt fileresemble the following


Changed the current scope context to 192.168.1.0 scope.

Dhcp Server 192.168.1.24 add scope 192.168.1.0 255.255.255.0 "Vlan-1" "Vlan-1"
Dhcp Server 192.168.1.24 Scope 192.168.1.0 set state 1


Edit the file and save

After this, delete the scope and run the below command to create the scope from the txt file 

C:\>netsh exec c:\dhcp.txt

This will automatically create the DHCP scope with the new subnet mask

This way you can change other configuration details along with subnet mask change, like IP range and Excluderanges

Thursday, January 30, 2014

checking Cisco ASA ASDM connection, https, ssh

Unable to asdm

make sure vpn 3-des is enabled

Issue "sh ver" and make sure the unit has 3-des license.

Hardware:   ASA5510, 256 MB RAM, CPU Pentium 4 Celeron 1600 MHz
Internal ATA Compact Flash, 64MB
Slot 1: ATA Compact Flash, 32MB
BIOS Flash M50FW080 @ 0xffe00000, 1024KB
.
.
Failover                     : Active/Active
VPN-DES                  : Enabled 
VPN-3DES-AES        : Enabled

If 3DES is not enabled, it is easy and free to the activaton key to enable that. Please go to http://www.cisco.com/go/license
and loging with your CCO ID and

and then choose Cisco ASA 3DES/AES License
Fill out all the information including the serial number of the firewall and you should see a message that says you will receive the activation key via
e-mail within 1 hour.

Once you receive the activation key via e-mail please add it to the unit via CLI

ASA#conf t
ASA(config)#activation-key <copy and paste the 4-tuple or 5-tuple>
ASA(config)#wri mem
ASA(config)#exit

Make sure to issue "sh ver" and make sure 3DES shows enabled.

make sure asdm image is loaded

Issure "sh ver" and make sure asdm image is loaded.

ASA# sh ver                        

Cisco Adaptive Security Appliance Software Version 8.2(1)
Device Manager Version 6.2(1)

If not make sure to tftp the appropriate bin fil to flash and configure "asdm image disk0:/asdm-621.bin".
Make sure you are running a matching asdm version for the ASA.


http server is enabled

Issure "sh run http" and make sure http server is enabled.

http server enable
http 172.18.124.0 255.255.255.0 inside ------> all hosts in this subnet are allowed to asdm
http 10.10.10.10 255.255.255.255 dmz ----> only one host 10.10.10.10 is the subnet is allowed to asdm

sh asp table socket

Make sure that the "sh asp table socket" shows that the unit is listening on port 443 on the interface that you are trying to asdm to. This command is not supported on the FWSM.

ASA# sh asp table socket

Protocol  Socket    Local Address               Foreign Address         State
SSL       0000e5bf  172.18.124.254:443          0.0.0.0:*               LISTEN
SSL       00019c6f  10.10.10.1:443              0.0.0.0:*               LISTEN

If you do not see the unit listening on port 443 then try to remove the "http server enable" line and add it back to the config.

ASA#conf t
ASA(config)#no http server enable
ASA(config)#http server enable

http access is allowed

Issue the command "sh run http" and make sure the IP address that you are trying to asdm from is allowed.

ASA# sh run http
http server enable
http 172.18.124.0 255.255.255.0 inside
http 10.2.180.32 255.255.255.248 inside

webvpn enabled on the port 443

Issue the command "sh run webvpn" and see if it is enabled and has configuration section under webvpn, then change the port that asdm
listens to something else other than 443.

ASA#conf t
ASA(config)#http server enable 4443

Once done try to lauch asdm by going to https://10.10.10.1:4443 where 10.10.10.1 is the interface IP address of the firewall that is closer to the client.

sh run all ssl

Issue the command "sh run all ssl" and make sure you see the following line highlighted in red in the output. If not add it in the config.

ASA# sh run all ssl
ssl server-version any
ssl client-version any
ssl encryption rc4-md5 rc4-sha1 aes128-sha1 aes256-sha1 3des-sha1

make sure to run the latest java

Download the latest java available http://www.java.com/en/download/index.jsp and install it on the client and try to launch asdm.

try another browser

If IE (Internet Explorer) doesn't work, try a different browser like Fire Fox, Safari or Chrome.

check the logs

Enable logging with the following command if not already enabled and check the logs.

ASA#conf t
ASA(config)#logging on
ASA(config)#logging buffered debug
ASA(config)#end

ASA#sh logg | i x.x.x.x where x.x.x.x is the client's IP address from which you are trying to asdm.

collect captures

If you are running ASA /PIX 7.2 or above code you can issue the "match" keyword in the capture. In the below command
capin - is the name of the capture
10.10.10.1 - is the IP address of the ASA that is listening on port 443
inside - is the name of the interface to which we are trying to asdm

cap capin int inside match tcp any host 10.10.10.1 eq 443
sh cap capin

Once done troubleshooting you can remove the cature by issuing "no cap capin". In case of FWSM the "match" keyword does not work please follow this link to configure captures on the FWSM: https://supportforums.cisco.com/docs/DOC-1222
Unable to telnet

make sure telnet is allowed

Issue the command "sh run telnet" and make sure telnet is allowed. Bear in mind that you cannot telnet to the lowest security interface on the firewall.

ASA# sh run telnet
telnet 0.0.0.0 0.0.0.0 dmz1
telnet 0.0.0.0 0.0.0.0 inside
telnet timeout 5

sh asp table socket

Issue the command "sh asp table socket" and make sure the firewall is listening on tcp port 23. This command is not supported on the FWSM.

ASA# sh asp table socket

Protocol  Socket    Local Address               Foreign Address         State
TCP       00024a1f  172.18.124.254:23           0.0.0.0:*               LISTEN
TCP       0002ea9f  10.10.10.1:23               0.0.0.0:*               LISTEN

If you do not see it listening then, remove the telnet lines from the config and add them back in.

check the logs

Enable logging with the following command if not already enabled and check the logs.

ASA#conf t
ASA(config)#logging on
ASA(config)#logging buffered debug
ASA(config)#end

ASA#sh logg | i x.x.x.x where x.x.x.x is the client's IP address from which you are trying to telnet

collect captures

If you are running ASA /PIX 7.2 or above code you can issue the "match" keyword in the capture. In the below command
capin - is the name of the capture
10.10.10.1 - is the IP address of the ASA that is listening on port 23
inside - is the name of the interface to which we are trying to asdm

cap capin int inside match tcp any host 10.10.10.1 eq 23
sh cap capin

Once done troubleshooting you can remove the cature by issuing "no cap capin". In case of FWSM the "match" keyword does not work please follow this link to configure captures on the FWSM: https://supportforums.cisco.com/docs/DOC-1222

Unable to ssh

make sure ssh is enabled and allowed

Issue the command "sh run ssh" and make sure ssh is enabled for the client IP or subnet. If not add the subnet or IP address that is allowed to ssh with the corresponding inteface.

ASA# sh run ssh
ssh scopy enable
ssh 0.0.0.0 0.0.0.0 dmz1
ssh 10.10.10.0 255.255.255.0 inside
ssh timeout 60

Is there an rsa key-pair

Issue the command "sh cry key mypubkey rsa" and make sure the "Default-RSA-Key" is present. If not create the rsa key-pair with the command "cry key generate rsa modulus 1024"

ASA# sh cry key mypubkey rsa
Key pair was generated at: 22:52:03 CEDT Aug 22 2007
Key name: <Default-RSA-Key>
Usage: General Purpose Key
Modulus Size (bits): 1024
Key Data:

  30819f30 0d06092a 864886f7 0d010101 05000381 8d003081 89028181 00b41d91
  .
  .
  effb9f5c 50a2ed60 290cdc4b ab1e0cc7 d334afdf e9850be4 c00faa18 47020301 0001
Key pair was generated at: 03:04:55 CEDT Sep 15 2010
Key name: <Default-RSA-Key>.server
Usage: Encryption Key
Modulus Size (bits): 768
Key Data:

  307c300d 06092a86 4886f70d 01010105 00036b00 30680261 008eba15 2281909f
.
.
  82db59d0 c3633648 6334ca6b ff531605 48ec82ce e9977506 97020301 0001

sh asp table socket

Issue the command "sh asp table socket" and make sure the firewall is listening on tcp 22. This command is not supported on the FWSM.
ASA# sh asp table socket

Protocol  Socket    Local Address               Foreign Address         State
TCP       0003dc4f  172.18.124.254:22           0.0.0.0:*               LISTEN
TCP       00043c7f  10.10.10.1:22               0.0.0.0:*               LISTEN
TCP       005de0a8  172.18.124.254:22           10.117.14.67:64892      ESTAB

check the logs

Enable logging with the following command if not already enabled and check the logs.

ASA#conf t
ASA(config)#logging on
ASA(config)#logging buffered debug
ASA(config)#end

ASA#sh logg | i x.x.x.x where x.x.x.x is the client's IP address from which you are trying to ssh.

collect captures

If you are running ASA /PIX 7.2 or above code you can issue the "match" keyword in the capture. In the below command
capin - is the name of the capture
10.10.10.1 - is the IP address of the ASA that is listening on port 22
inside - is the name of the interface to which we are trying to asdm

cap capin int inside match tcp any host 10.10.10.1 eq 22
sh cap capin

Once done troubleshooting you can remove the cature by issuing "no cap capin". In case of FWSM the "match" keyword does not work please follow this link to configure captures on the FWSM: https://supportforums.cisco.com/docs/DOC-1222

Friday, January 17, 2014

cisco anyconnect installation issue: Cisco security desktop won't run

this issue mostly due to Java or activeX security setting

solution:
1. low the java security setting.
or change the IE security setting by uncheck the protected mode.

anyconnect installation error: The VPN client agent was unable to create the interprocess communication depot

 Internet Connection Sharing (ICS) is not compatible with AnyConnect. You must disable ICS for proper AnyConnect functionality.
When you try to launch AnyConnect on a PC on which ICS is already running, AnyConnect returns this error message:
The vpn client agent was unable to create the interprocess communication depot.
In order to resolve this issue, disable the ICS and launch again AnyConnect.

solution:
  1. Click theStartbutton.
  2. Click onControl Panel.
  3. Click onView Network Status and Tasks
  4. Click onChange adapter settings
  5. Right-click the shared connection and choose Properties
  6. Click the Sharing tab
  7. Clear theAllow other network users to connect through this computer's Internet connectioncheckbox
  8. Click OK
  9. reboot
  10. reinstall anyconnect

Tuesday, December 10, 2013

Cisco anyconnect client installation error: VPN Agent Service not responding

you might see this error when you are doing VPN client installation

"VPN Agent Service not responding"
when you check the status of network adapter, the VPN adapter is disabled, and after you enable it, then doing installation, same error and the adapter has been disabled again, what is the problem?

1. you might have more than one anyconnect clients been installed.
2. you might have internet sharing enabled

solutions:

1. disable the internet sharing
2. uninstall all vpn clients and reboot computer then re-install.

Friday, December 6, 2013

Juniper SRX Series: Creating and managing the “Rescue Configuration

Juniper SRX Series: Creating and managing the “Rescue Configuration”.

A rescue configuration allows administrators to define a known working configuration or a configuration with a known state that can be loaded (this is called a configuration roll-back) at any time.
This alleviates the necessity (on Junper devices) of having to remember the rollback number with the rollback command.
Rescue configuration can be used to roll back to a known configuration or as a last resort if device configuration and backup configuration files became damaged beyond repair.

To create a rescue configuration, it is possible to use the request system configuration rescue save operational mode command:
twister@gw-srx> request system configuration rescue save
To roll back to the rescue configuration, the rollback rescue command can be used:
twister@gw-srx> rollback rescue
load complete
After rolling back to the rescue configuration, you must commit the configuration to activate it:
twister@gw-srx> commit
On SRX Branch devices, it is also possible to press and quickly release the Reset Config Button to load and commit the rescue configuration.
The Reset Config button is recessed to prevent it from being pressed accidentally.

By default, pressing and quickly releasing the Reset Config Button loads and commits the rescue configuration. The Status LED is amber and steadily on during this time.
By default, pressing and holding the Reset Config button for 15 seconds or more, until the Status LED is amber and steadily on, deletes all configurations on the device(including the backup configurations and rescue configuration) and loads and commits the factory configuration.

How to use Telus Actionec T3200M as a wireless Access point

when you install Telus Internet, they will offer you a modem + router + wireless device Actionec T3200M, a lot of users still want to use th...